In the last post, we looked at the Game Loop and how to run our game at the sweet spot of 60fps. Now, let’s see some results, shall we? Time to make some pretty shapes.
By using canvas, we’re moving beyond the world of basic JavaScript, and using a set of functions available only to the canvas ‘context’. By its very nature, the canvas element is a platform for pixel manipulation. Once we’ve set up a context, we can access and edit any pixel in it. If we want to draw a line we could, should we want to, loop through a line of pixels and set them to a colour of our choosing. But doing that is very inefficient in JavaScript and, instead, the context provides us with a number of functions to speed those operations up, such as lineTo(). You can see a full list of those functions available to us over on this handy cheat sheet.
Diving straight in, let’s look at our main() function from last time:
function main() {
    // Here's where we handle all the input, logic and drawing to the screen per frame.

    // call itself by requesting the next animation frame, and so begin the endless loop
    requestAnimationFrame(main);
}
It’s looping at 60fps. Now let’s draw ourselves a red rectangle with the function, fillRect(x, y, width, height). Think of this as the Hello World of drawing applications.
function main() {

    // set colour to red for all following canvas operations.
    ctx.fillStyle = '#f00';
    ctx.fillRect(0, 0, 50, 50);

    requestAnimationFrame(main);
}
And there we have it. A 60fps red rectangle! Look at it go!
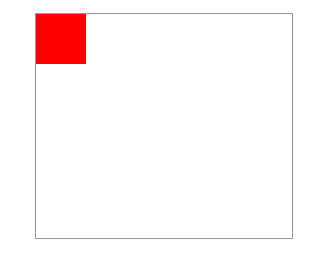
Okay, that’s just an image. But you get the idea.
The ctx object is the canvas context which we set in the last post as a global variable. Using that, we define a colour which is set for all following drawing operations. If we then draw another rectangle, it would also be red, up until we set a new fillStyle.
The canvas element works a lot like a paint program. Each time something is drawn to the screen, it stays there until you erase it. So, if we introduce some animation, say, moving the rectangle 1px to the right on each frame, we’re going to slowly animate drawing a pretty big line:
var x = 0;

function main() {

    // set colour to red for all following canvas operations.
    ctx.fillStyle = '#f00';
    ctx.fillRect(x, 0, 50, 50);

    x = x + 1;

    requestAnimationFrame(main);

}
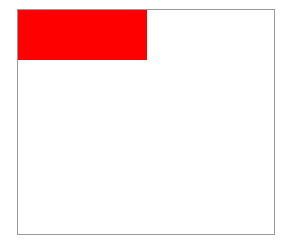
If we want to make it look like the rectangle is moving, we need to clear the canvas before drawing to it again on each frame with clearRect();
function main() {

    ctx.clearRect(0, 0, 256, 224);

    // set colour to red for all following canvas operations.
    ctx.fillStyle = '#f00';
    ctx.fillRect(x, 0, 50, 50);

    x = x + 1;

    requestAnimationFrame(main);

}
The clearRect() function works like fillRect(). Give it x and y coordinates and a width and height. In this case we’re clearing the whole canvas. The canvas element is transparent by default, but if you know what the background color will always be – in this case, white – then we don’t actually have to clearRect() but instead we could set the fillStyle to #fff and use fillRect(0, 0, 256, 224) at the start or end of the loop which would set the while canvas to white, ready for us to paint on again. Clearing tends to be the safer option though.
It’s important to note that you don’t need to clear the whole canvas all the time. There may be times when clearing only a section of the canvas makes sense (or not at all if nothing happens between frames). Curiously, for such basic operations, clearRect() and fillRect() are fairly expensive in terms of processing power. We won’t worry about this just yet, but later on we could look to improve performance by only clearing what we need to and when, if at all.
Moving on! Drawing some rudimentary shapes is all well and good, but we’re writing a game, dammit, and it is not attack of the red blocks. It’ll have images and sprites and stuff. So, we’re going to need an image and a way to put it on the canvas. This is where we discover the wonders of Spriters Resource.
Drawing images
Say hello to Link!

He says hello.
I’ve created a link.png file and a new images folder to our folder structure. Adding Link to our game requires us to first load in the image. Let’s add a new global variable for our link image.
var canvas = document.getElementById('super-js-adventure');
var ctx = canvas.getContext('2d');
var width = 256;
var height = 224;
var link = new Image();
Images like this, which would probably be used everywhere in the game, should be initialised on game load. It just so happens we have a function for that: init()! So we’ll load the image in the init() function:
function init() {
    // Initialise the game!
    link.src = 'images/link.png';
}
Now we can go back to the main loop and draw link to the screen with canvas’ drawImage() function.
function main() {
    // Here's where we handle all the input, logic and drawing to the screen per frame.
    ctx.clearRect(0, 0, 256, 224);

    ctx.drawImage(link, 20, 20);

    // call itself by requesting the next animation frame, and so begin the endless loop
    requestAnimationFrame(main);

}
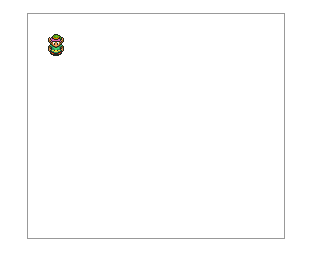
And there we have it. Link makes an appearance so we can now class our little app as a true Zelda game. Just, uhh... don’t tell Nintendo.
Progress
You can see v0.3 of the game here
Or check out all the source code on Github.