I have reached a point with the level editor where I am ready to move on now. It’s all gotten a bit wood-for-the-trees. I’ve spent far longer on it than I meant to, but I needed to make sure that it could handle (inevitable) future changes without needing to wipe the data and start the maps all over again. But I just want to get it out and get using it to find the issues.
Here is what our editor looks like now:
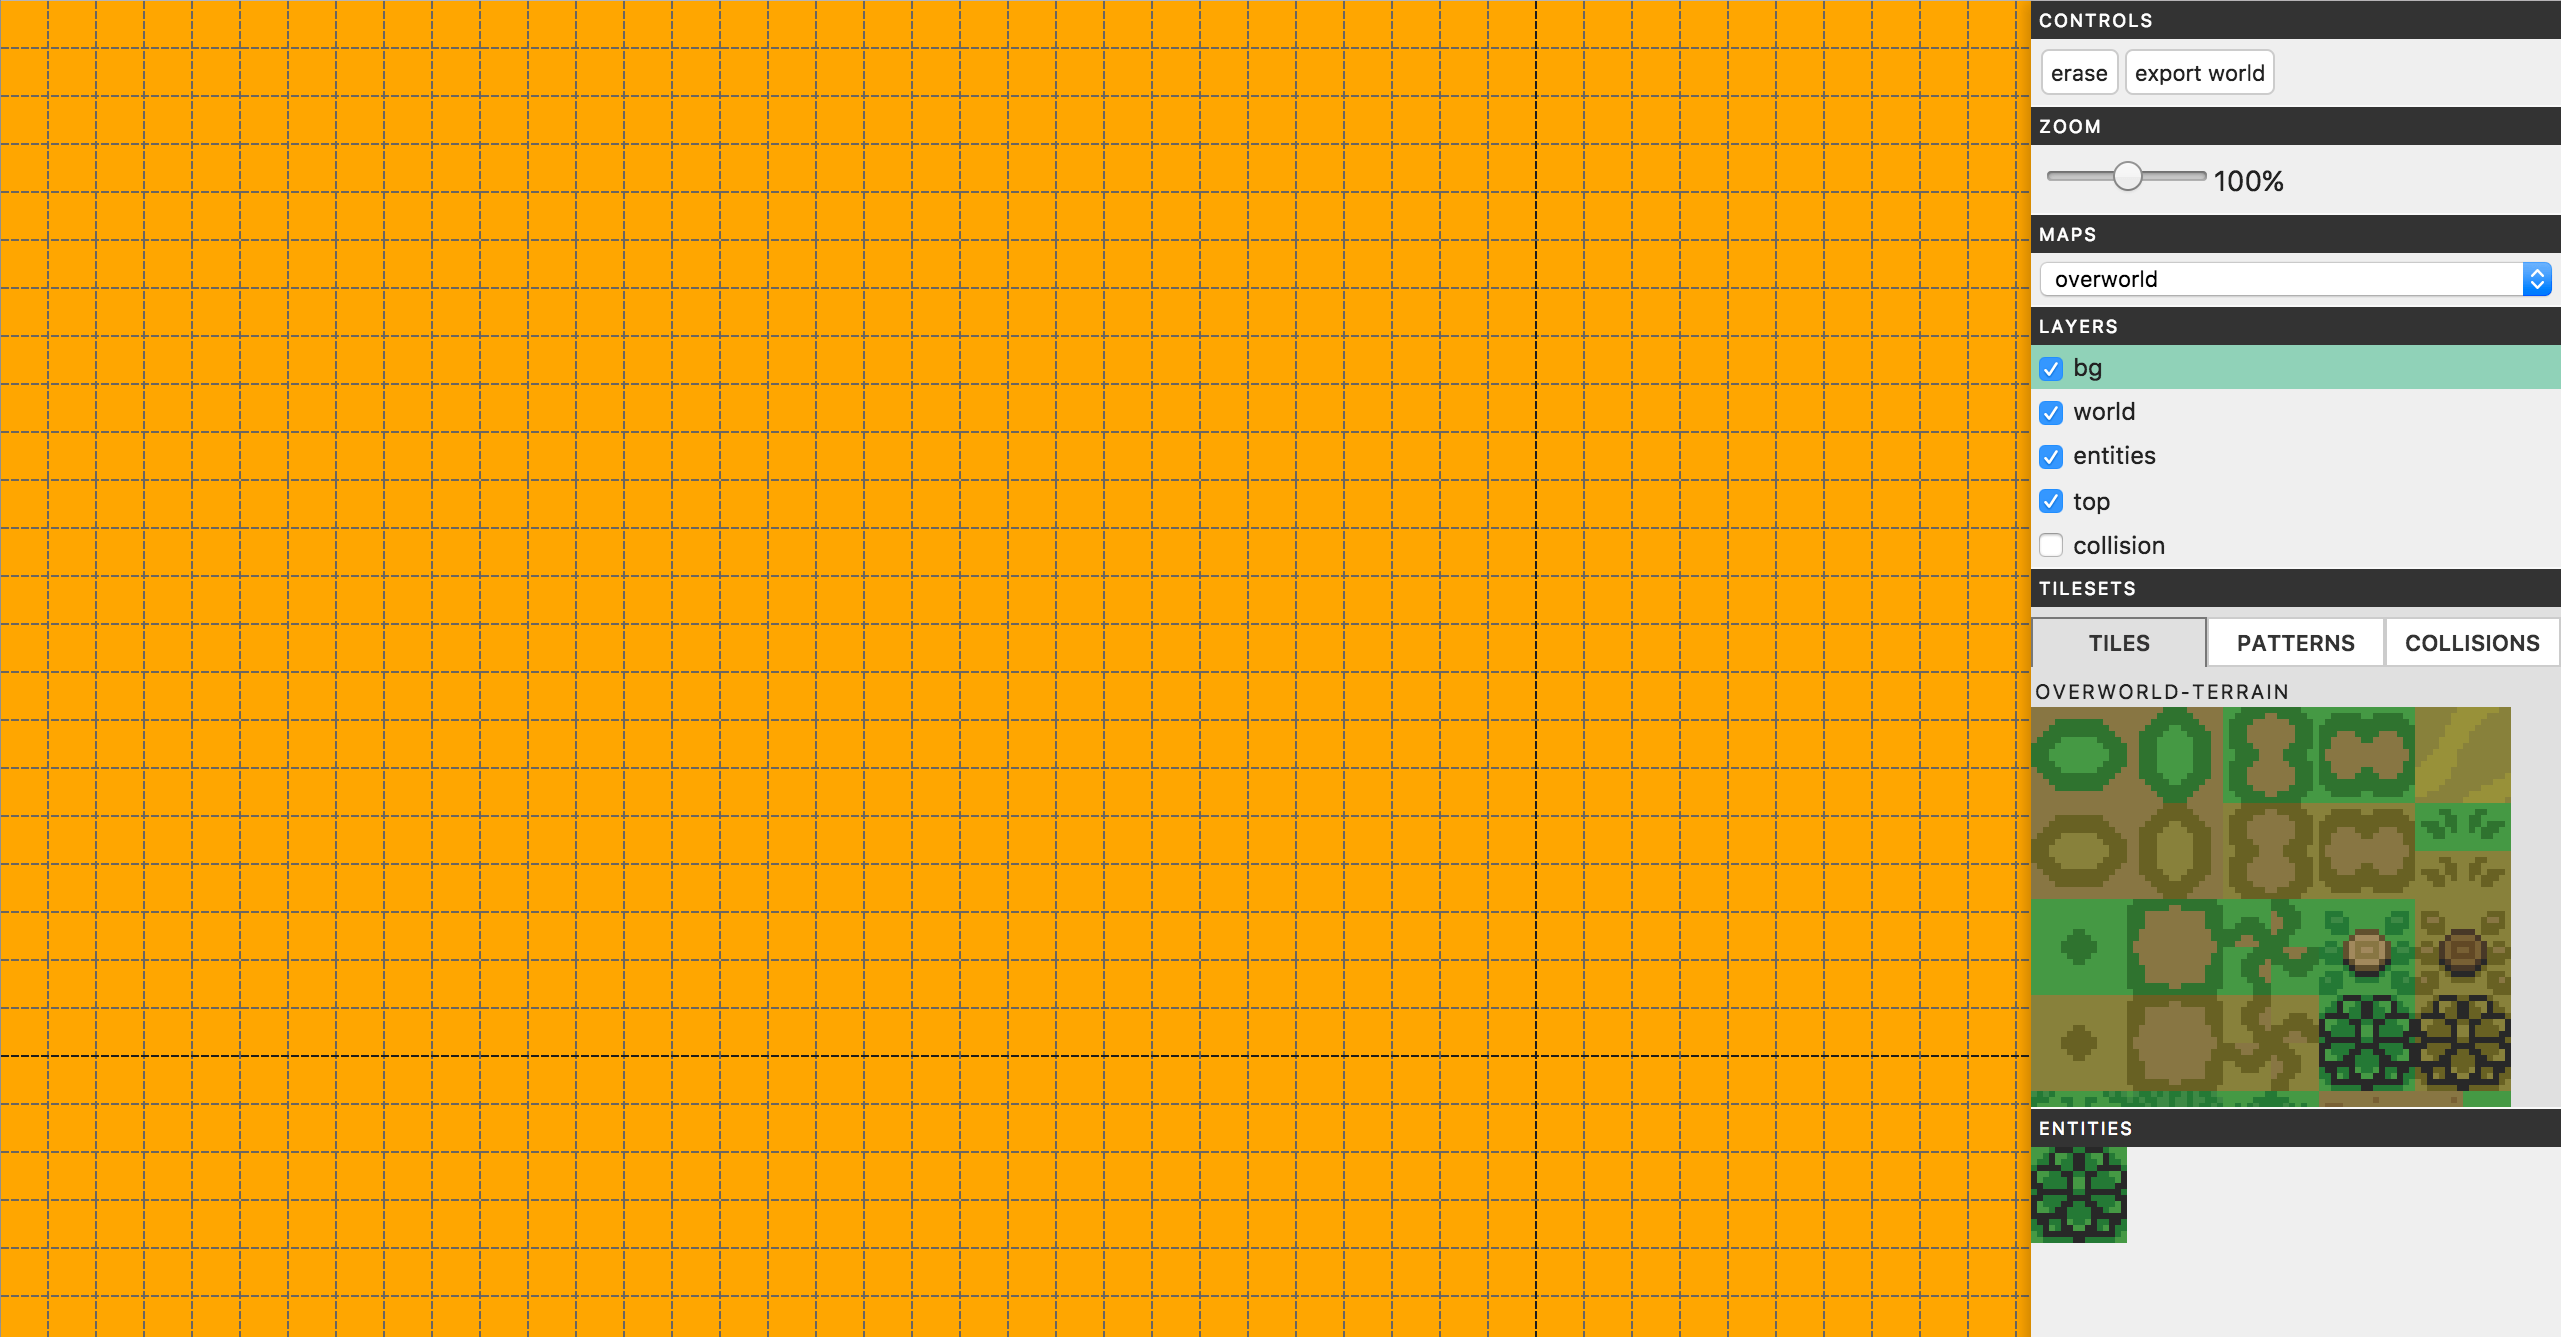 (Click for larger image)
There have been a few modifications to the interface, some additions, some space-saving tweaks (I work a lot on a 13 inch MacBook) and the rest for clarity.
As you might expect, there is a fair amount going on with this editor, and I mentioned in the last post I don’t want to cover every aspect of the editor, like I plan to with the game. Otherwise it’d be another series of articles to itself! But there are some interesting things going on in the editor, and problems I came across which might be nice to explore.
If you want to jump right in and have a play then head over to the editor. Or if you want to dive into the source code go right ahead.
Otherwise, stay tuned and I’ll roughly cover the features and usage of the editor. Then afterwards, for those still interested, I’ll go a bit deeper and cover some of the concepts. I may ramble a bit. Anyway, onwards!
Using the Editor
Upon booting up the Editor, the sidebar will populate with buttons, lists and tiles. Then the main viewing area, the Viewport, will become orange and gridded. Given the config data already supplied, the editor will default to the ‘overworld’ map and the ‘bg’ layer. The collisions layer will default to hidden.
If the selected map is larger than the viewport, you can freely scroll the map within the viewport, otherwise it will center itself within the viewport.
The Panels
Control Panel
We have the erase button. This button is toggle-able. When selected, clicking on the viewport will remove a tile/collision/entity at the clicked cell from the selected map and layer. The export button opens a modal window and provides a JSON-formatted version of the saved data for use directly within the game (which, admittedly, the game needs updating to support). In the modal, there is a copy button, which will select all the code and should copy it to your clipboard.
Zoom Panel
The zoom control. This zooms to 25%, 50%, 100%, 200% or 400% and takes effect once you release the mouse.
Warning: Trying to edit at a zoom level other than 100%, is not recommended. There are known issues and there could be unintended side effects
Maps Panel
There is a dropdown of all the currently configured maps. Selecting another will cause the Viewport to update with that map’s saved data (if any).
Layers Panel
A list of all the currently configured layers. Clicking on the name of the layer will select it, and toggling the checkbox will toggle that layer’s visibility in the viewport.
Tilesets Panel
Three tabs: Tiles, Patterns and Collisions. The tiles tab lists all the tilesets with their names in a scrollable window. You can click on a tileset to select a particular ‘tile’ or, you can click and drag (within the same tileset) to create an ad hoc pattern. In the patterns tab is the list of predefined patterns; Mostly unnecessary now you can create them at will (you couldn’t in the early versions). In the collisions tab you can select one of several collision shapes which are particular to this engine.
Entities Panel
Lists all the predefined entities. Click on an entity to select.
The Viewport
If you have a tile, pattern, collision or entity selected, a ‘ghost tile’ will unceremoniously appear within the viewport and will follow your mouse around to show what has been selected and where it will be set when you click on the viewport.
You can click and drag on the viewport to ‘paint’ tiles onto the selected layer. If you have created a pattern and drag the mouse along the viewport, it will not tile correctly. You will simply repeat the edge-most tiles of the pattern. I don’t intend to fix this. It sounds painful.
There are special circumstances surrounding the collisions and entities. No matter what layer is selected, if you select a collision and click the viewport, it will go onto the collision layer. Entities will be placed on the entities layer.
I think that about wraps up the features/usage. Keep reading for a look at some code.
Under the hood
Again, I am not using any kind of build step for my code, so every file is included manually and uses some of the latest JS additions where they were deemed useful. So it does require an up-to-date browser.
Also, I am still experimenting with Kyle Simpson’s OLOO code style, as covered in his You Don’t Know JS book. Not to its best effect, mind you, but it does explain why you will rarely see the new operator and, instead, lots of Object.create().
The Files
Aside from the helper file, each file represents its own object/module:
<!-- Helpers -->
<script src="js/helpers.js"></script>
<script src="js/utils.js"></script>
<script src="js/eventer.js"></script>

<!-- DB -->
<script src="js/db.js"></script>

<!-- UI -->
<script src="js/ui/ui.js"></script>
<script src="js/ui/marker.js"></script>
<script src="js/ui/modal.js"></script>
<script src="js/ui/maps-panel.js"></script>
<script src="js/ui/layers-panel.js"></script>
<script src="js/ui/patterns-panel.js"></script>
<script src="js/ui/tilesets-panel.js"></script>
<script src="js/ui/collisions-panel.js"></script>
<script src="js/ui/entities-panel.js"></script>

<!-- Engine -->
<script src="js/grid.js"></script>
<script src="js/sprite.js"></script>
<script src="js/pattern.js"></script>
<script src="js/entity.js"></script>
<script src="js/layer.js"></script>
<script src="js/gamemap.js"></script>
<script src="js/viewport.js"></script>

<!-- Editor -->
<script src="js/editor.js"></script>
The naming should be fairly self-explanatory. I’ve grouped them into logical themes: generic helper stuff, database, UI modules and the 'engine'.
The Editor Object
This is the application file, if you will, it ties all the modules together with, basically, magic.
Okay, not magic.
When the Editor is initialised, it first stores some of the config data locally, or to a Global namespace, then runs:
// Promises all the way down.
// The functions toward the end do not need to return Promises (they do not have any async operations), but it makes it look quite neat. Also... Promises!
this.loadAssets()
.then( () => this.createWorldObjects() )
.then( () => DB.init() )
.then( () => this.loadData() )
.then( () => UI.init(config) )
.then( () => Viewport.init(config.maps) )
.then( () => this.setupEvents() );
Loading assets is first, as so much of the application relies on them. Then, using those assets we create some objects like patterns and entities.
Of the files above, those grouped as 'engine' do most of the heavy lifting. If this were a relational database then the engine could be thought of like so: The Viewport has one map, a map has many layers. So when we create the Viewport, it sets up the map which sets up its layers. The Viewport is also responsible for handling the events within it, relaying them to the map or layers, like clicking when a tile is selected.
Layers
The Layer object acts as both the conceptual tileset/collision/entity data and also the visual canvas representation of itself. When I first built the editor I was calculating tile indexes based on the numbers of tiles in tilesets lower down in the list of tilesets e.g. If tilesets[0] had 100 tiles, its indexes would be 0-99 but the indexes in the tilesets[1] would be 100-tileset.length, etc... This is an excellent idea for the final map, but horrible during development. Any change to a tileset would throw off every other tile. So, after a re-think I added two arrays to the Layer object:
let Layer = {

    init(name, tilesWide, tilesHigh, tilesetNames, data) {
        this.name           = name;                             // name of the layer
        this.tilesetNames   = tilesetNames  || new Array();     // array of the tileset names per cell
        this.data           = data          || new Array();     // The layer's data. Could be the tileset indexes, the collision type indexes, or entity objects, or whatever!

        ...
    }

}
Tileset layers use two parallel arrays to store the tileset ID/name along with the relative index within that tileset. Yes, changing a tileset in particular ways can affect already placed tiles, but at least it’s confined to that tileset which feels easier to manage.
Collision layers and Entity layers only use the data array.
Entities are stored differently in their layer compared to other layer types. Instead of indexes, they are stored as reference objects, e.g.:
{
    id: "bush1",
    x: 20,
    y: 50
}
Using just that data we can find which entity we need to show, and where it needs to sit on the layer.
UI
For the interface, I’m trying to keep each panel compartmentalised, so there is an object for each. They are responsible for creating the various elements and applying their events. Using a small custom event emitter, ‘Eventer’, I can send out events when any interaction is done on a panel and have the appropriate function listen and operate on that event, allowing for more loosely coupled code. e.g.:
// layer-panel.js
if( inputClicked ) {
    Eventer.dispatch('toggleLayer', idx, inputChecked);
    return;
}

// viewport.js
Eventer.on('toggleLayer', (idx, checked) => {
    if( checked ) {
        this.currentMap.layers[idx].show();
    }
    else {
        this.currentMap.layers[idx].hide();
    }
});
Database
The database is handled by IndexedDB. LocalStorage just was not up to storing such large arrays efficiently. And when I say large, the overworld map is over 135,000 tiles… There may have been a way to break up the data to be more manageable, but it was just easier to go with a more suitable technology. Connecting to a local DB is an asynchronous operation so we use Promises to defer everything until it loads (or doesn’t). Then we get the content from the DB and load it into ‘memory’. By which I mean store it in a variable.
Using the Eventer module, I dispatch events whenever a tile or entity is placed which is caught in the Editor and causes the entire DB to save.
Things found out during development
-
At first I attempted to create a map using
<div>s to represent a tile. But once a map reaches a certain size (which I can’t remember but it was relatively few), using HTML to place tiles became too slow, often crashing the browser. Canvas was the only option. -
It’s easier to create maps in one big grid, thereby allowing the game to decide what is a ‘room’, etc... The editor should just make it as easy as possible to place tiles.
Next steps
Firstly, I need to re-tool a number of the tilesets and also add new ones. Then I’ll need to flesh out the entities. And, finally, create the actual maps!
Progress
Check out the editor progress on version 0.8
Or see all the source code on Github.